I'll be honest. Once the calender hits November 1st, I am a monster. A carol-singing, obnoxiously cheery, snow-loving, festivity-loving, holiday maniac. To me November 1st through the New Year really is the most wonderful time of the year, so of course I'm doing my best to fill my children with this immense love for the season and all the wonderfulness it entails.
One bit of that awesomeness: the true spirit of Thanksgiving. We're not much for materialism. We refuse to shop ANYWHERE- not even gas stations- on Thanksgiving, and Black Friday is only a blip on our radar because occasionally we can get a true need met or supply for something on a good sale then. Door-busters we are not. We like Thanksgiving for the family and the true spirit of gratefulness. Even with all the intense trials we have faced in the last several years- maybe even BECAUSE of those trials- we have so much to be grateful for, and we are eager to instill this in our children.
We encourage our kids to be aware of things, and thank others and God for things without reminding- either from their parents or a holiday. This year we're doing this by way of the Tree of Thanks. We're mixing my love for festive decorations, the fall season, and mushy-gushy nostalgia of traditions and memory-making with an opportunity for character lessons and serving others every day. I've seen a lot of versions of a "Thanksgiving Tree," "Thankful Tree," and various other names- the styles are more numerous than the names for this same concept- but this is a simple, inexpensive, kid-friendly from start-to-finish project that ends up a beautiful, festive work of collaborative 'art with a heart.' This Tree of Thanks fits one side of our full-size sliding glass doors. You can use half the amount of brown construction paper and make it fit perfectly in a large window, or customize it any way you'd like.
Supplies Needed:

- 4 pieces of brown construction paper
- 2 pieces each of red, orange, yellow, and green construction paper
- A pair of scissors
- A marker
- Packing tape
I like to use packing tape for several reasons. Firstly, it holds up well for the long hall, which is important because we keep this up until December 1st. Secondly, it is versatile and can be rolled into various shapes, widths, and length very simply(and with one hand! Always important with kids involved). Thirdly, the clean-up is way easier. Scotch tape and the like can stick to glass and be SUCH a pain- and possibly damaging- to scrape off. Packing tape rolls off easily and any adhesive residue is easily removed with glass cleaner.
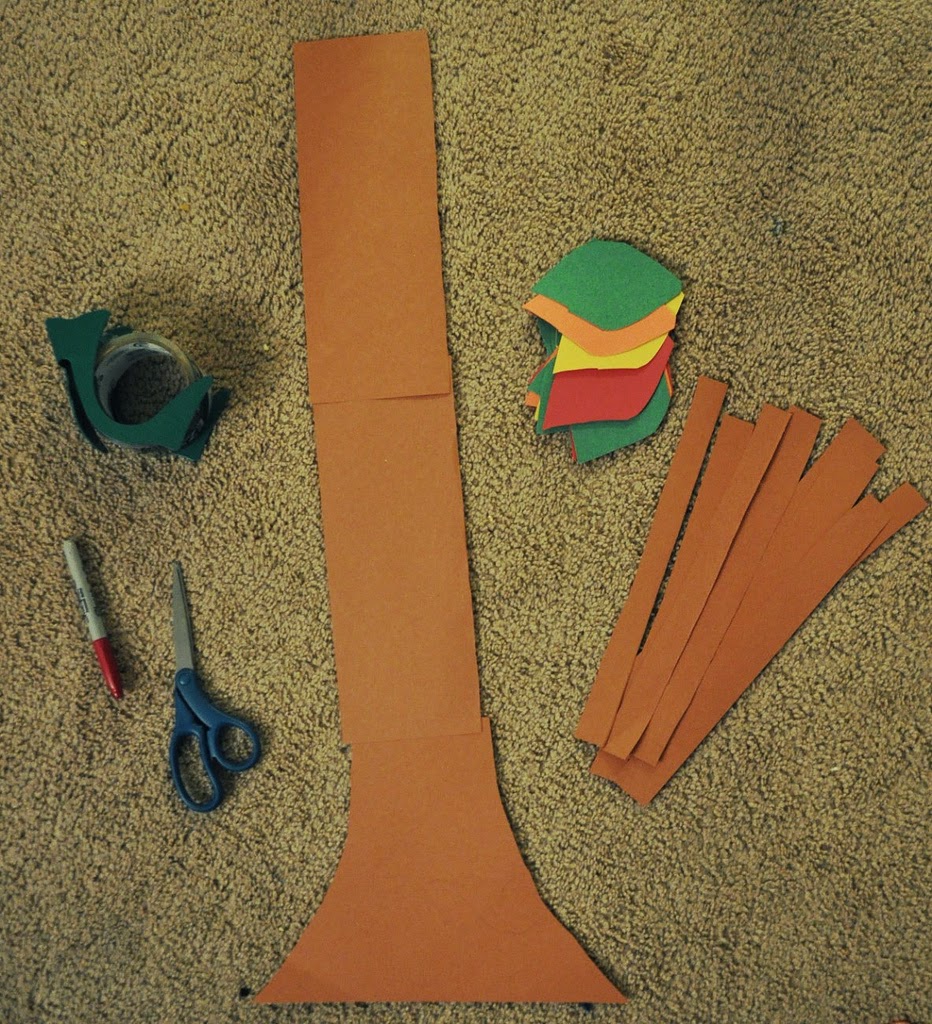
Cut one piece of the brown paper into the base of the trunk, making the ascending trunk piece matching in width to the next trunk piece and so-on. Cut two more pieces of the brown paper in half length-wise(these are the trunk), and the fourth into 8 even strips length-wise(these are the branches). The other colored pieces I layered into a stack to save time, and just cut out leaves.
Freestyle! Let your creativity glooooooooow! As you can see, I got REAL crazy and did basic pointy ellipse-like things. As many as the paper makes.

Starting at the roots, tape the tree to the window using rolled tape strips, and line up the trunk pieces so they almost match and make a straight line.
If your kids are real hands-on and not just watching Mama do it all, this will not be a straight line. Stress not! It's going to be covered by leaves in a week or so. *wink* You can even decorate the brown trunk with some 'bark carvings' a la the last century. Caution: You may need to explain this to your kids. Poor things don't know what they're missing, not carving their names into the flesh of a tree in the name of eternal love.
I know. I'm showing my age here.
Space the branches out at the top of the tree however you choose. Two on the top and three on each side works well, but really this is all a formality. Depending on how many offspring you have adding leaves to your Tree of Thanks, you may barely fill the branches, or you you may end up covering the entire glass surface with a mosaic of construction paper.
Now comes for the character lesson. While we put this all together, my kids and I chatted about thankfulness, gratefulness, what it means to take things for granted, and why that's not good. When it was all assembled, we each picked a leaf and wrote down one thing we were thankful for and why, then prayed for that thing/person, thanking God for him/her/it, etc. The kids had a blast, and are already looking forward to tomorrow's additions to the Tree of Thanks. In the mean time, we put the remaining unused leaves, the marker, and the tape in a basket on a shelf so it's easy to access any time. This is a must in our house, because things like tape have a way of growing legs and walking away, not to be found again for months.
We'll update with finished pics after December 1st!
 |
| It'll get prettier, I promise! |
 |
| Mama did some helping with the leaf-writing |
 |
| Can't forget the man of my dreams |
 We encourage our kids to be aware of things, and thank others and God for things without reminding- either from their parents or a holiday. This year we're doing this by way of the Tree of Thanks. We're mixing my love for festive decorations, the fall season, and mushy-gushy nostalgia of traditions and memory-making with an opportunity for character lessons and serving others every day. I've seen a lot of versions of a "Thanksgiving Tree," "Thankful Tree," and various other names- the styles are more numerous than the names for this same concept- but this is a simple, inexpensive, kid-friendly from start-to-finish project that ends up a beautiful, festive work of collaborative 'art with a heart.' This Tree of Thanks fits one side of our full-size sliding glass doors. You can use half the amount of brown construction paper and make it fit perfectly in a large window, or customize it any way you'd like.
 Cut one piece of the brown paper into the base of the trunk, making the ascending trunk piece matching in width to the next trunk piece and so-on. Cut two more pieces of the brown paper in half length-wise(these are the trunk), and the fourth into 8 even strips length-wise(these are the branches). The other colored pieces I layered into a stack to save time, and just cut out leaves. Freestyle! Let your creativity glooooooooow! As you can see, I got REAL crazy and did basic pointy ellipse-like things. As many as the paper makes.
 Now comes for the character lesson. While we put this all together, my kids and I chatted about thankfulness, gratefulness, what it means to take things for granted, and why that's not good. When it was all assembled, we each picked a leaf and wrote down one thing we were thankful for and why, then prayed for that thing/person, thanking God for him/her/it, etc. The kids had a blast, and are already looking forward to tomorrow's additions to the Tree of Thanks. In the mean time, we put the remaining unused leaves, the marker, and the tape in a basket on a shelf so it's easy to access any time. This is a must in our house, because things like tape have a way of growing legs and walking away, not to be found again for months. We'll update with finished pics after December 1st!


Comments
Post a Comment